Using layer blending modes & other imaging tips
Layer blending modes offer a way for a layer to integrate with the adjustment layers below it, and can add depth to an image, or can be a good way to add sharpening. This is a powerful tool, and is worth experimenting with.
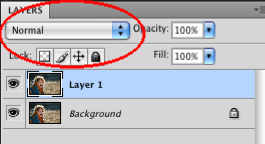
First of all, here's where to access the layer blending modes in the layer palate:

Pull down the drop-down menu to see what options there are.

Give your image depth & contrast with a Soft Light layer:
- Stamp together all your adjustment layers into one layer on top of your adjustment layer stack (press Option + Command + SHIFT + letter “e” at the same time)
- Change the blending mode in the layer panel to Soft Light.
- You’ll see that your image gets a lot darker. Adjust the opacity until you like it (try between 25% and 50%)

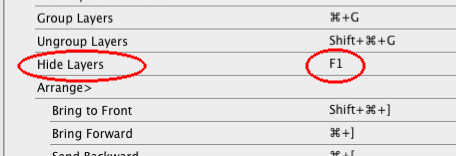
- Another good trick when using blending modes (or doing anything with layers) is to make a keyboard command for turning on and off a layer - so you can see exactly what that layer is doing. We set the F1 key to turn on and off the layer. Under Edit go to Keyboard Shortcuts. Find the Layer options (there will be a triangle next to "Layer", open the options by clicking on the triange). Scroll down until you see Hide Layers. Click next to it under Shortcut, and a box opens up - type the F1 key in there. Press Accept to override other functions assigned to the F1 key.

Using the color blending mode to correct uneven skin tones
- Make a new layer. In the layers panel, Option + click on the icon that looks like a turned up piece of paper, or under the Layers panel, select New.
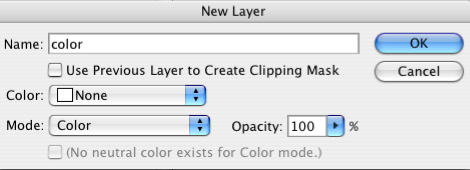
- You’ll get some options. Name the layer “color” and under Mode, choose Color. Click OK.

- With the eyedropper tool, select a nice skin tone color.
- Using the brush tool with soft edges and a low “flow” (keep Opacity at 100%), brush the color in the area that needs to be corrected. You might have to lower the opacity of that layer.
How to get detail in the shadows of an image that is too dark with Shadows/Highlights (not exactly a blending mode but another good trick):
- Stamp together all your adjustment layers into one layer on top of the layer stack (press Option + Command + SHIFT + letter E)
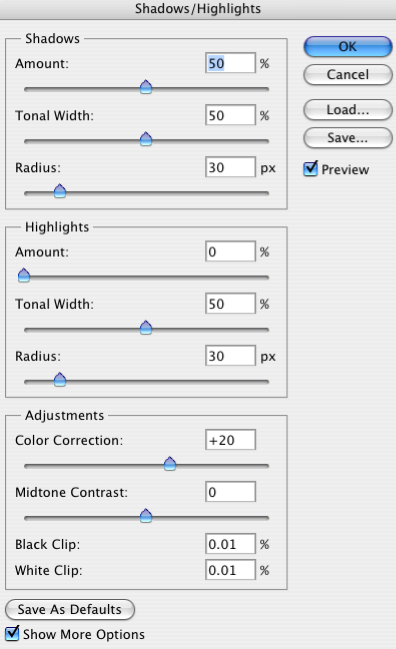
- Go to Image/Adjustments/Shadows and Highlights
- Use the default settings
- Adjust to opacity to a low amount, around 10% to 15%. You'll see that the shadows open up without looking forced or solarized.

There are many other uses of blending layers, some of which we will be discussing in later posts. With blending modes, you can create a dodge and burn layer, or a layer to add noise/grain, or you can add sharpening through filtering a layer in a blending mode. Stay tuned for more info on these methods!
